


Photo by Harrison Broadbent on Unsplash
Lab: I built my own Raspberry Pi! (in detail)
The step-by-step guide to learning how to build a small but mighty computer


Quick Update
If you're reading this, thank you for your patience. My biggest growth opportunities at the moment are consistency and discipline, and recently, it hasn't been easy for me. I have been combating stress, anxiety, and self-doubt for a while now which, I learned, mainly stems from my health condition (I'm usually open to talking about it but I'll leave it for another blog post in the future). Currently, I have been listening to my body's response to these stresses (and also weather changes) and have been resting from work and other regular activities since Sunday. In direct words, some allergies and a cold progressed due to the wacky Westcoast weather we've been having. But regardless, I am thankful for the ability to rest and recharge, and also, be in my parents' company. (Remember: Attitude of Gratitude!)
To update from my last post, I ended up postponing my Security+ exam date to the next month and I feel that this would be ample time for me to really grasp what I am learning. I'm still trying to figure out a format to share what I learn with you through these posts but so far, my studies have been going well and one of these days I'll start writing about it. (also good for reinforcement!)
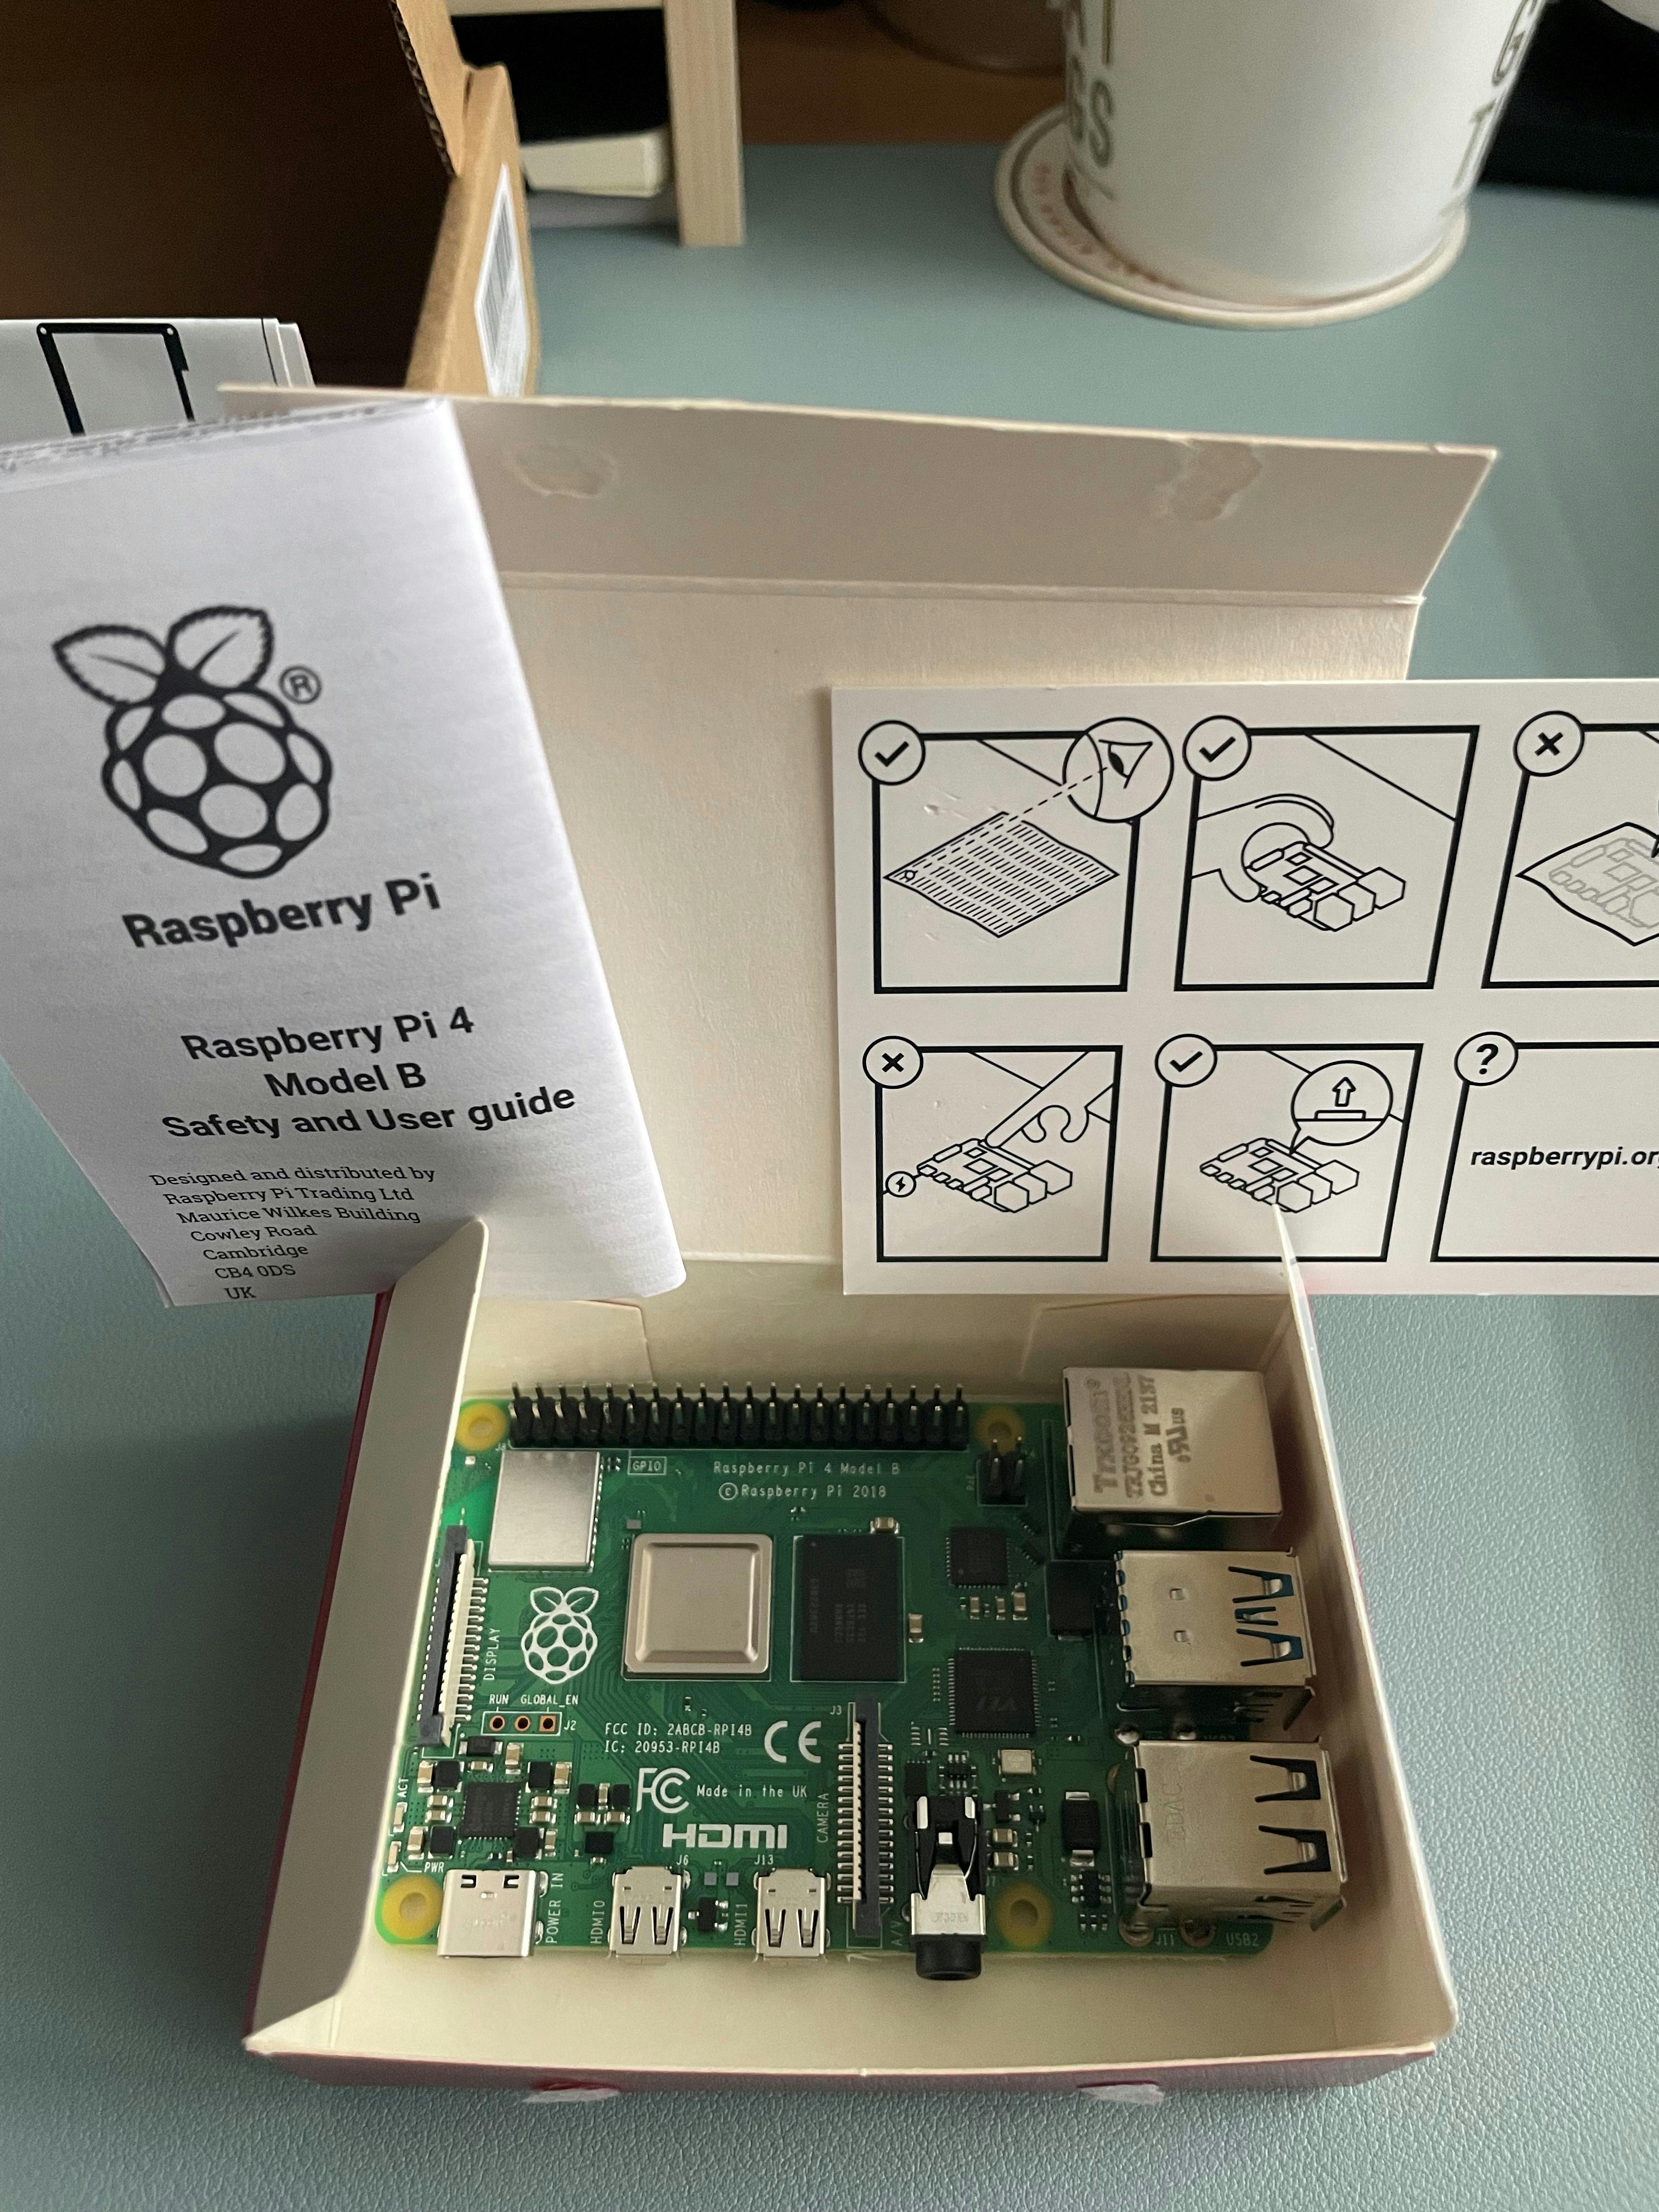
Today, I went more hands-on and took the opportunity to build my Raspberry Pi computer! I initially bought the parts almost 2 months ago but did not get to start it until now due to other priorities at the time. I'm excited to explore more of this mighty computer's capabilities but for now, I'll be sharing with you how I built it and some of the issues I had to troubleshoot on my own (even while following a video).
As a new learner, I am open to constructive feedback that will help me grow and become better!
Videos I followed
- Simply Cyber's Setup: I followed Gerry's video up until the Docker part (saving this for another day)
- Jon Good's Setup Guide: I followed Jon's video from beginning to end, however, this one leaves you with the terminal screen and doesn't show you how to get to the GUI (graphical user interface)
What you'll need
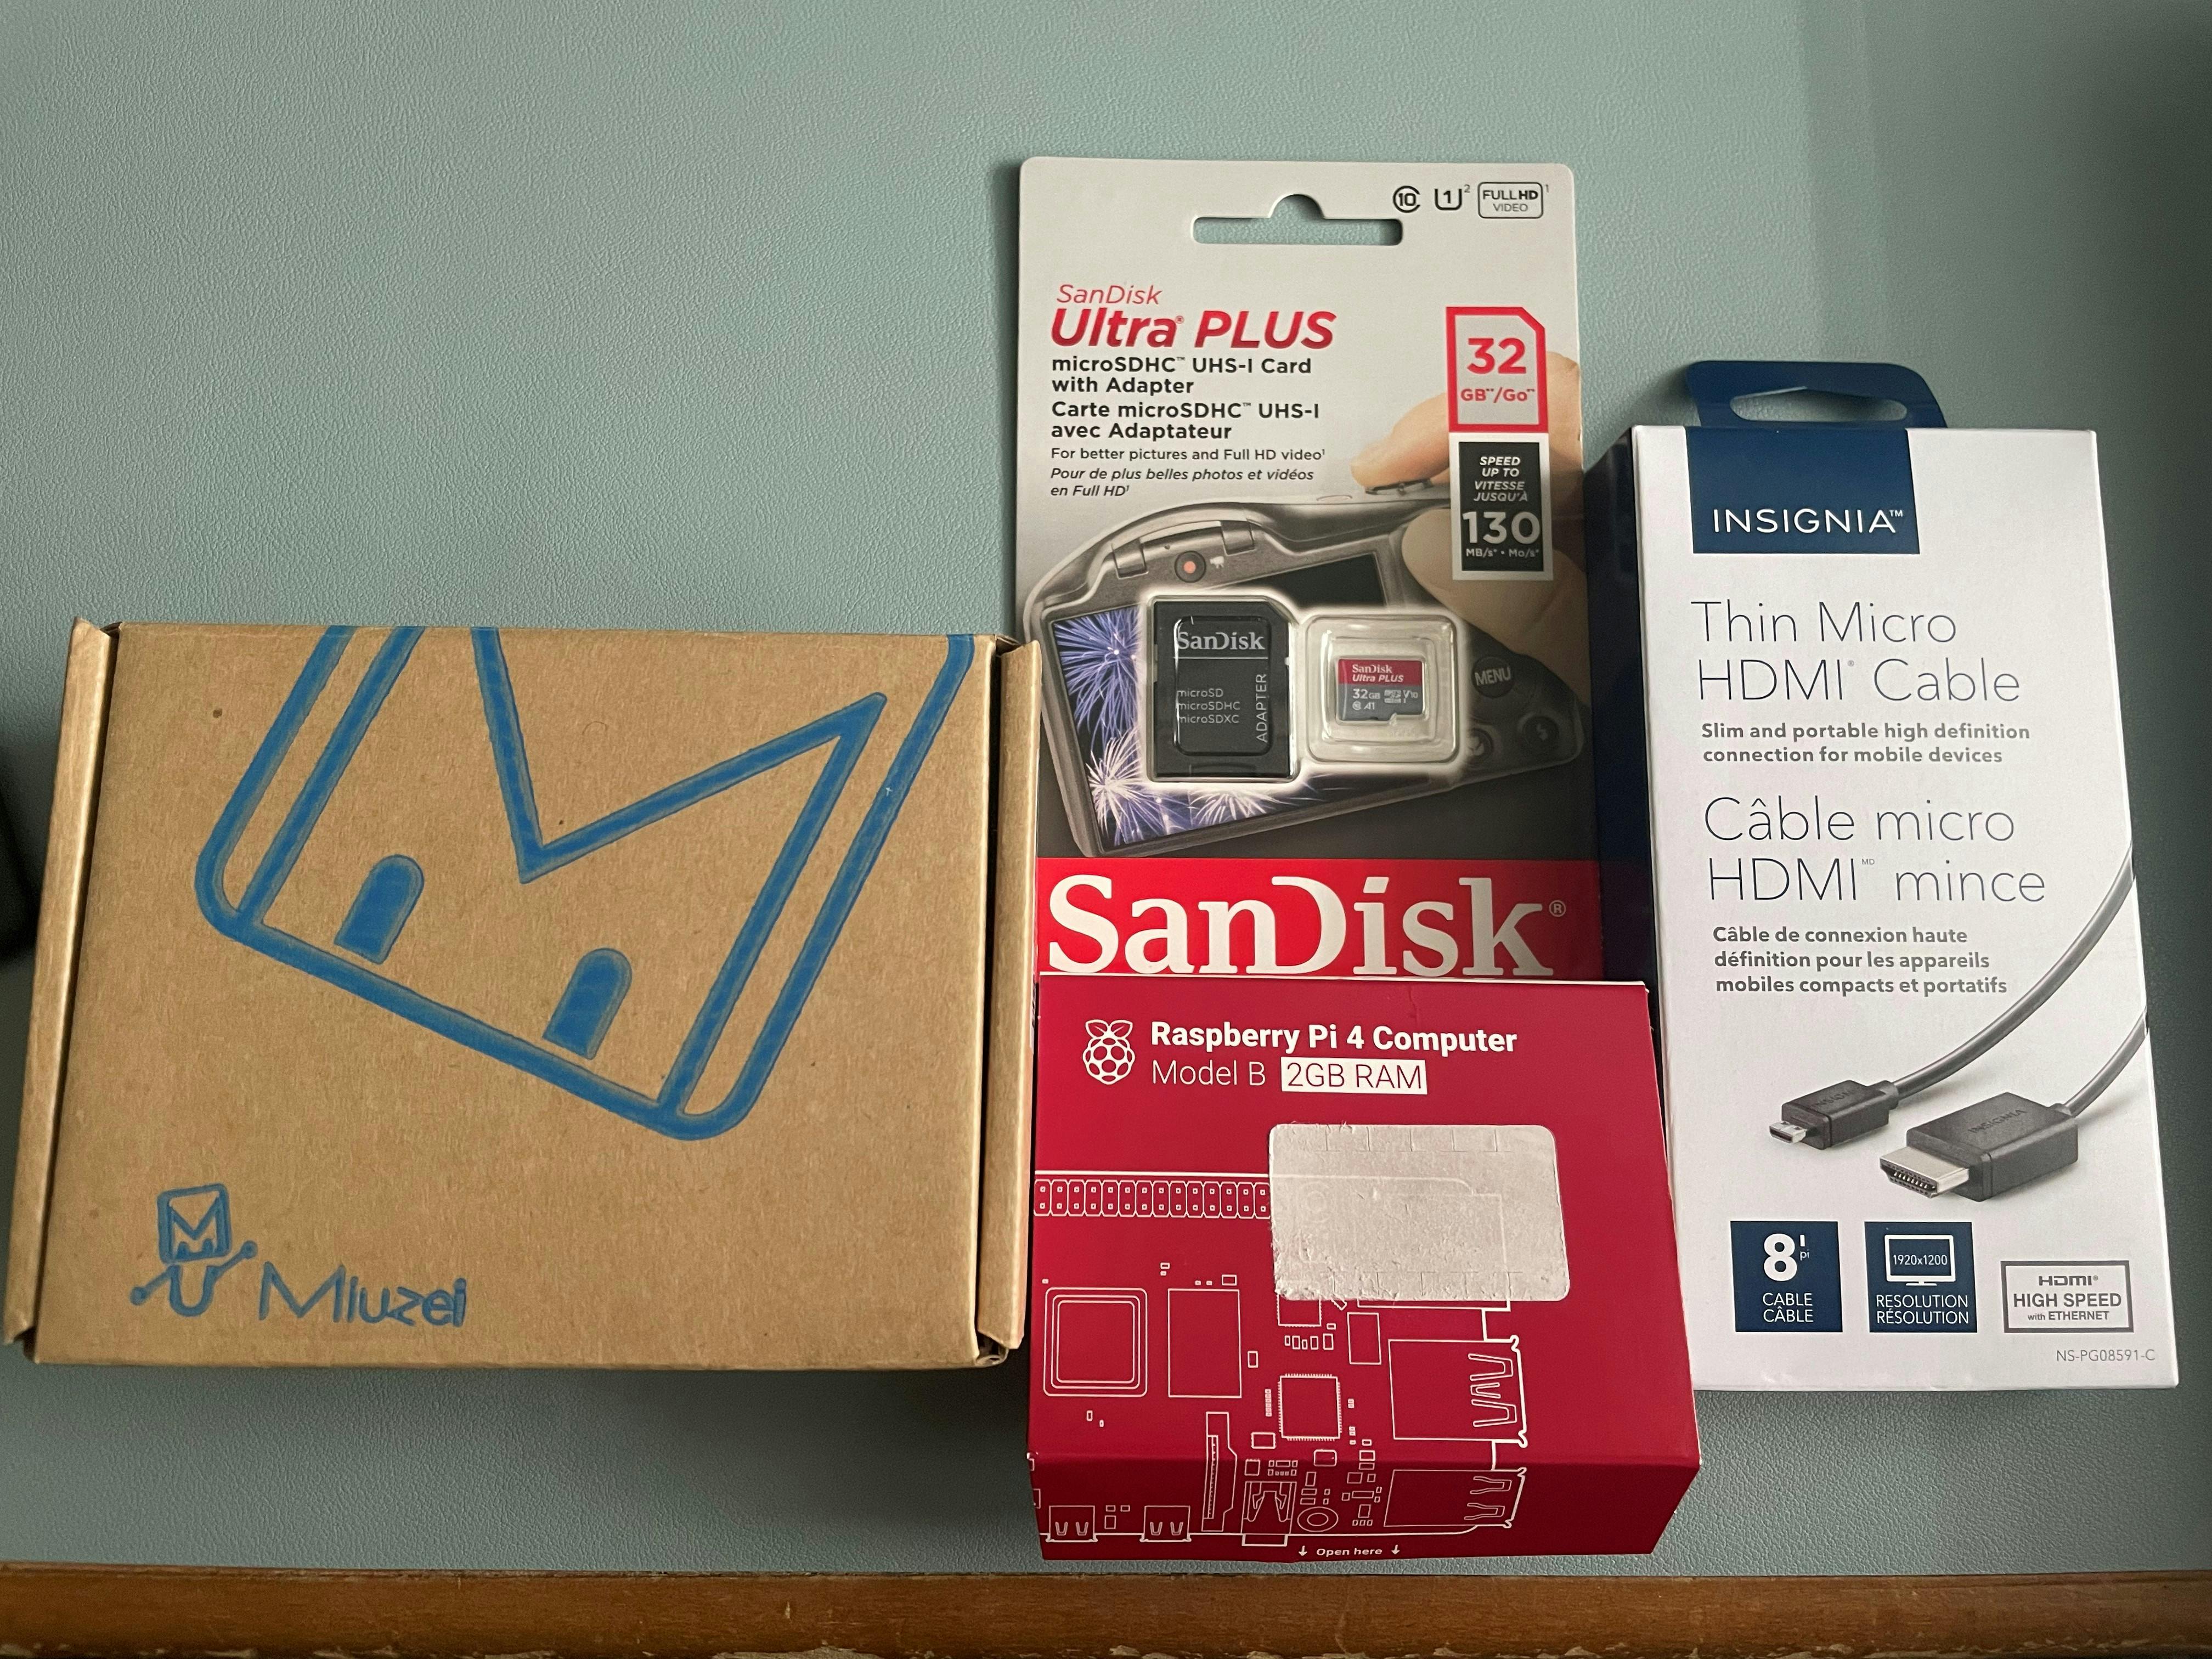
- Raspberry Pi Case: can be any case of your choice as long as it fits the correct Raspberry Pi model. The one I bought is from Miuzei (the same one shown in Gerry's video)
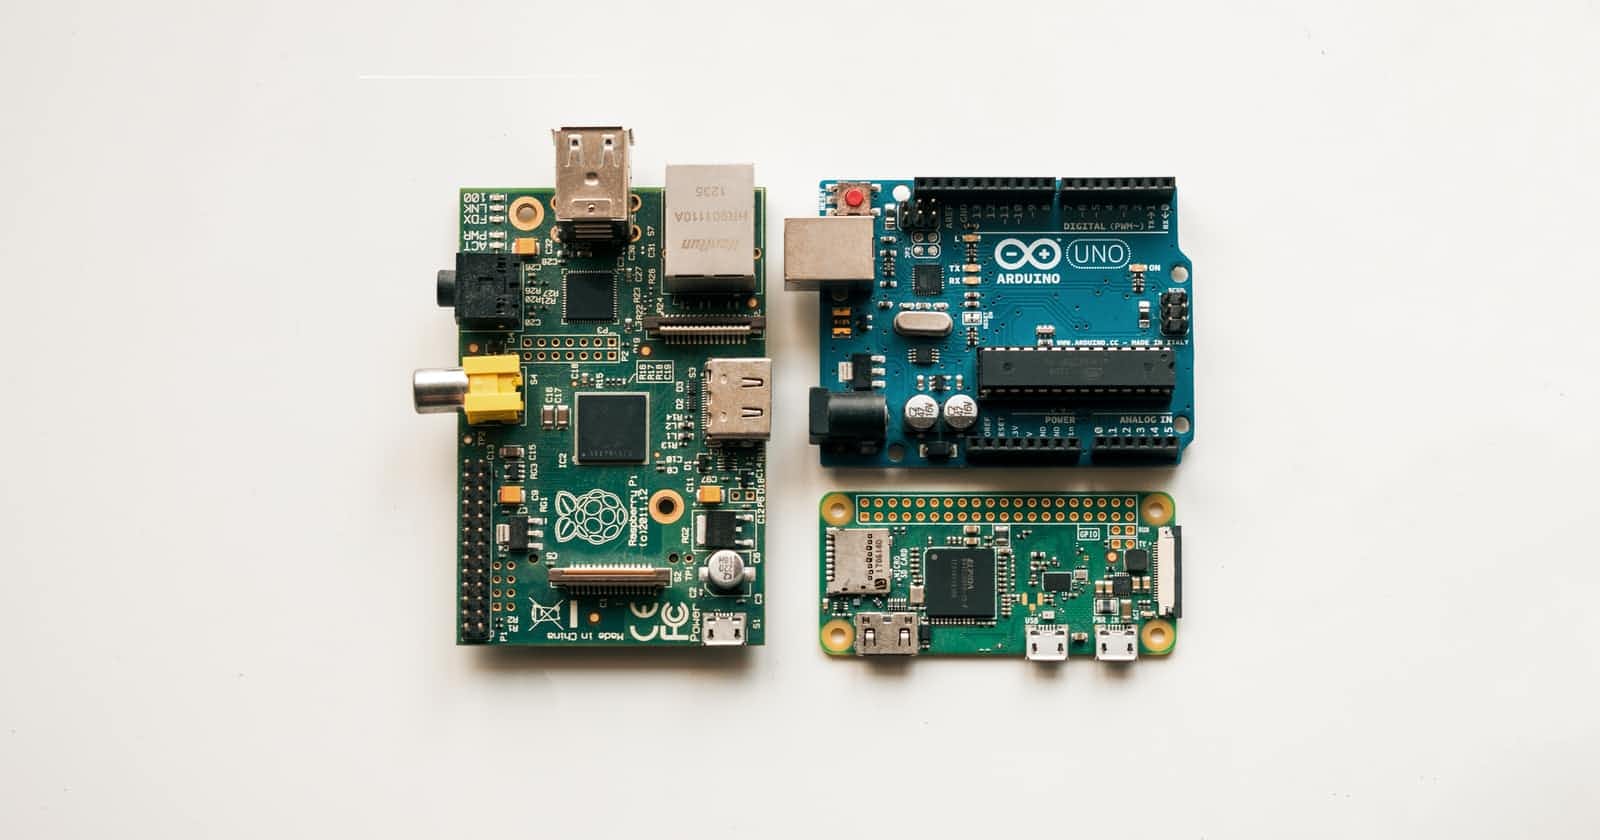
- The actual computer: Raspberry SC15184 Pi 4 Model B 2019 Quad Core 64 Bit WiFi Bluetooth (2GB)
- Multi SD Card Reader: to load the Raspberry Pi OS onto the Micro SD card
- 32GB (or more) Micro SD Card: stores the bootable Raspberry Pi OS
- HDMI-to-Micro HDMI cable: to plug in the computer to a screen monitor
- USB-C to USB-A cable (or USB-C to USB-C cable) and proper wall charger: to power up the computer
- Screen monitor
- Mice & Keyboard
- Your main computer/laptop: to load the Raspberry Pi imager
Write the Raspberry Pi OS onto the Micro SD
- insert the Micro SD card into the card reader and plug it into your main computer
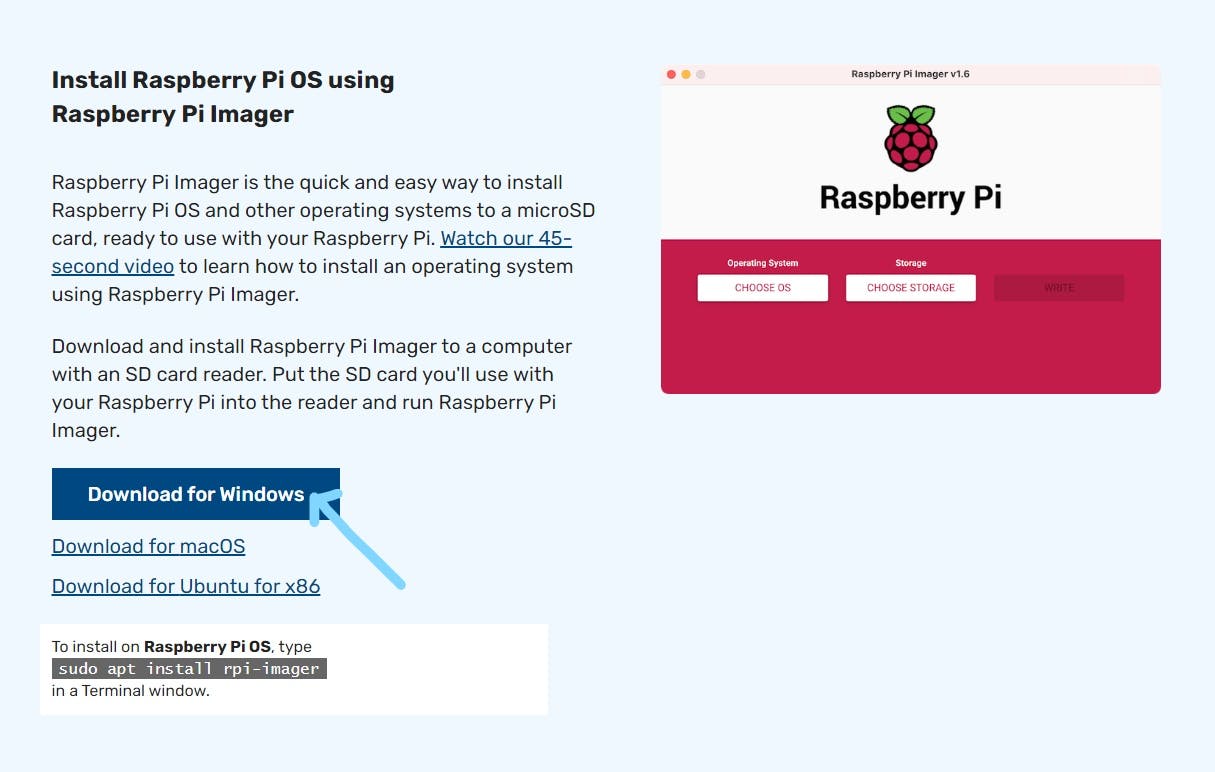
- head to the Raspberry Pi website to install the latest Raspberry Pi Imager software (choose the one that is appropriate to your main OS -- I chose Windows since that is what I'm using)
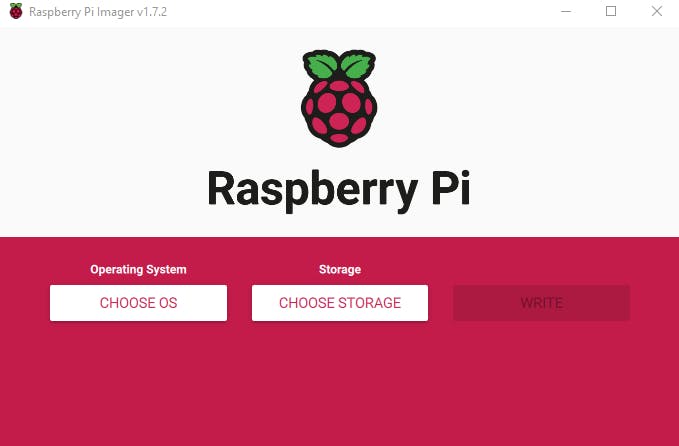
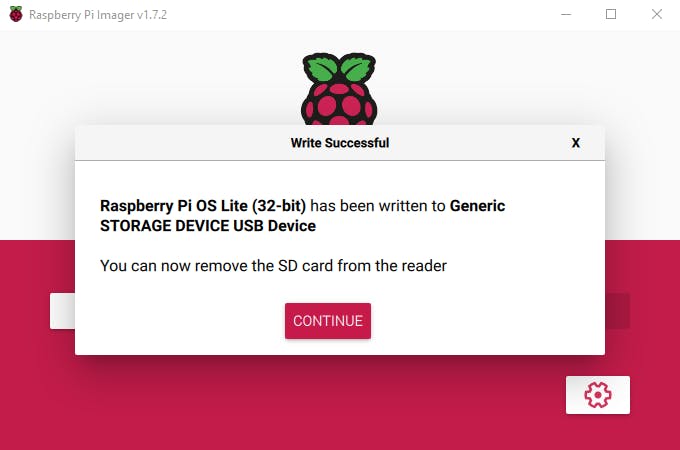
- after it downloads, click to run the program and it should look something like this:
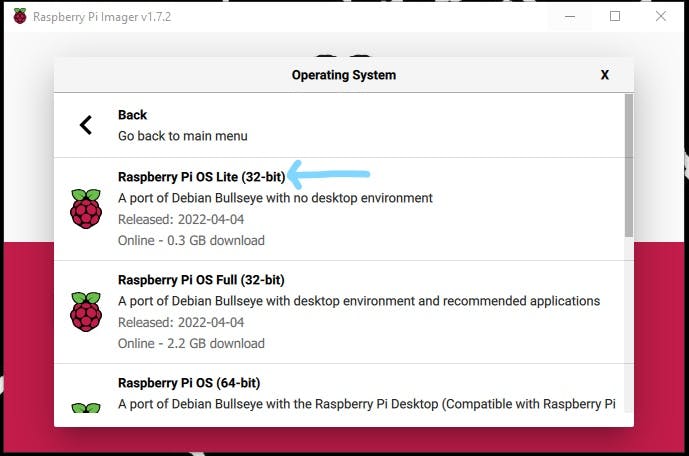
- select Choose OS > Raspberry Pi OS (other) > Raspberry Pi OS Lite (32-bit)
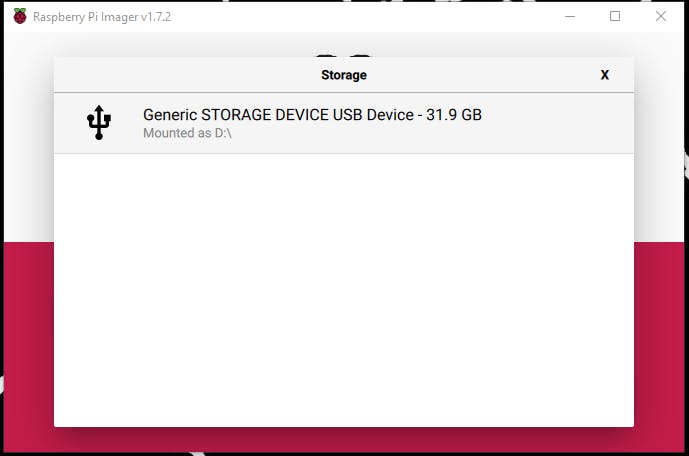
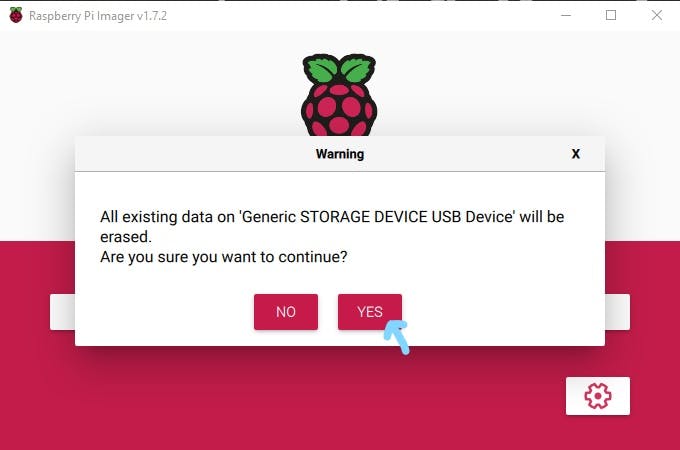
- select Choose Storage > (find the Micro SD card listed and make sure that is the correct one as it will overwrite any existing data), then click Yes
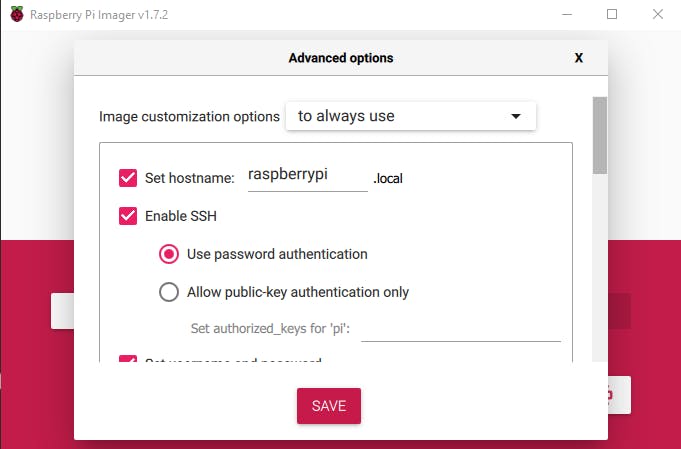
- open up the Advanced Options by pressing Ctrl+Shift+X or use the button near the bottom right corner of the imager window and ensure that the "Image Customization Options" is set "to always use" and that the Hostname, SSH, and Username/Password are selected and set up (you can select Configure WLAN and Set Locale Settings as well but these can also be configured later on), then click Save and then Write
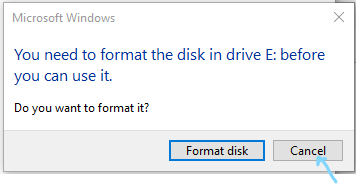
- the following window might open (make sure to click Cancel to avoid wiping our progress)
after it has completely loaded, the Raspberry Pi OS should now be loaded on your micro SD card -- Congratulations! (select Continue to finish)
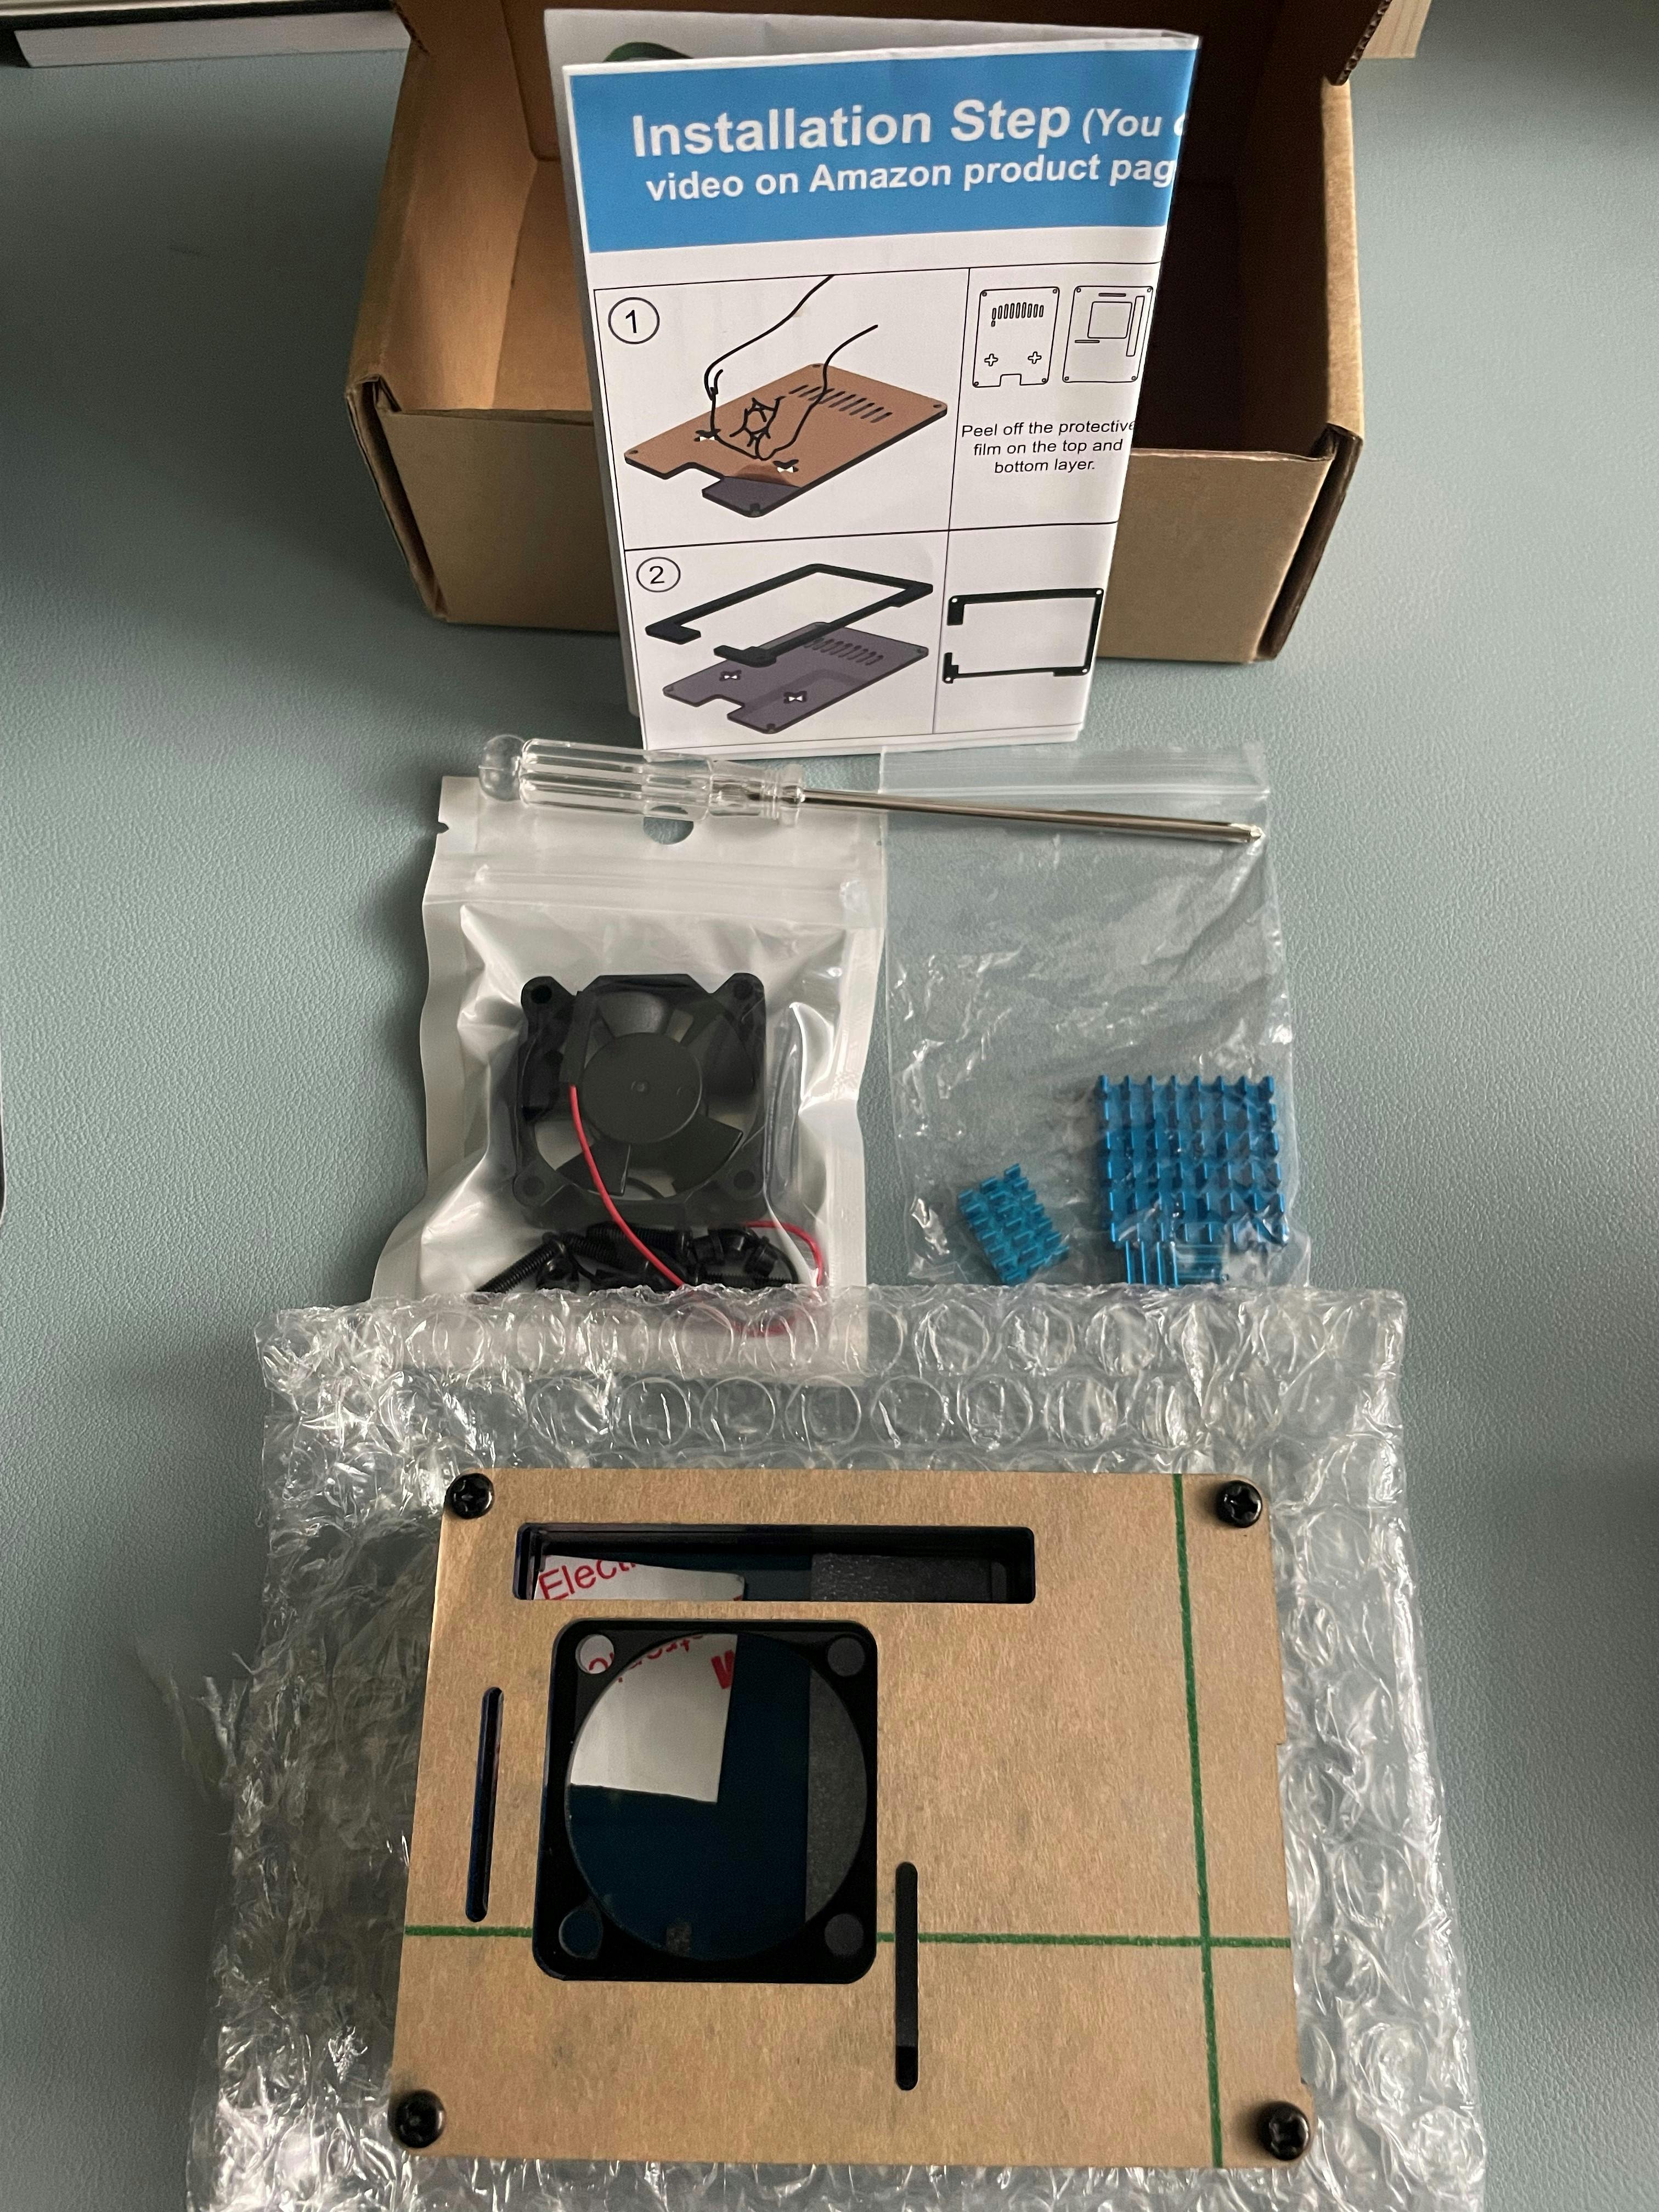
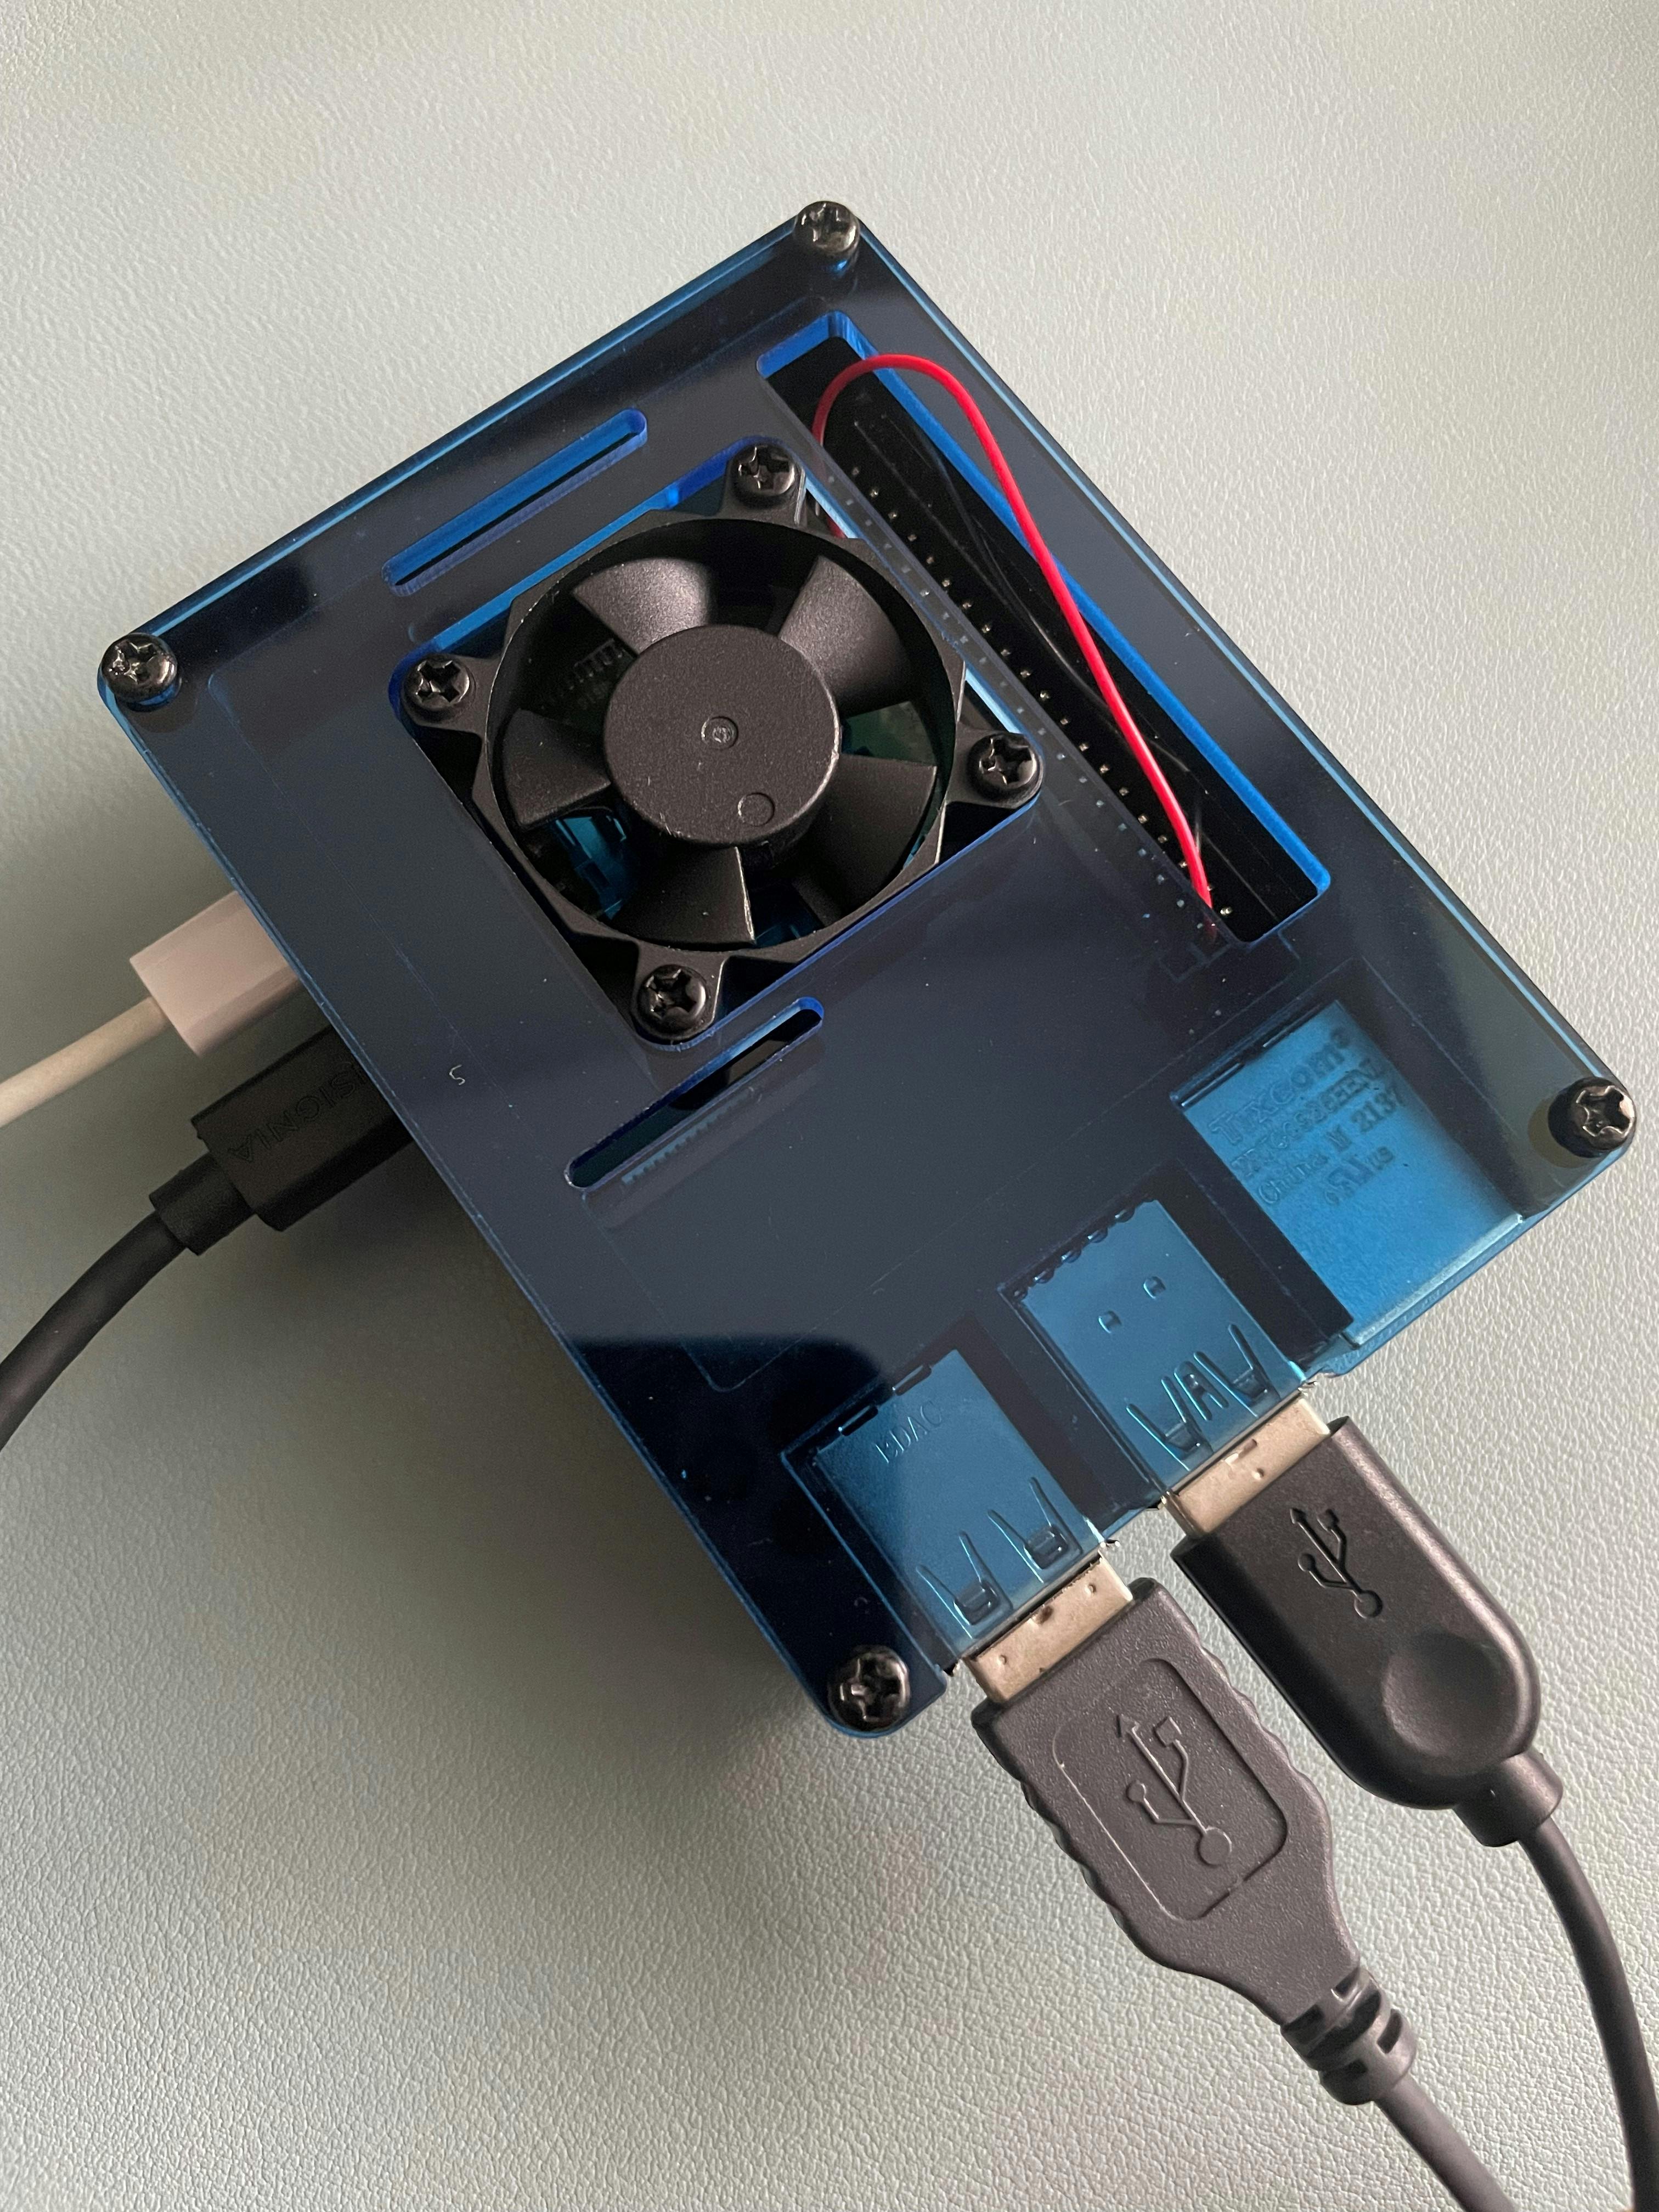
It's time to insert the card into the RasPi! I won't be showing you how I assembled my computer as it is different for everyone. Your set should come with easy-to-follow instructions.
Time to power up the Raspberry Pi
- insert all cables and storage accordingly (mice, keyboard, HDMI/micro HDMI to the computer and monitor, micro SD, USB-C for power)
Troubleshooting opportunity
- I noticed that when I plugged in the power source, the RasPi did not boot up nor did it have a built-in ACPI (Advanced Configuration and Power Interface a.k.a. power button)
- tried to plug in and out on both ends (didn't work)
- I found this Youtube video (thanks MikeJRthe2nd!) using a power bar with a switch as its ACPI
- I took a power bar (switched off), plugged in the Pi, then switched it on and it worked!
Initial setup

- initial power-up may lead you to a terminal since the RasPi is based on Debian Linux (in some videos I saw, it went straight to a GUI (graphical user interface); I'm not sure if they set it up prior to it but don't worry, I will show you how to set it up to boot as a GUI in another blog post!)
SSH
What is SSH: Secure Socket Shell -- a networking protocol that keeps the communications between computers secure
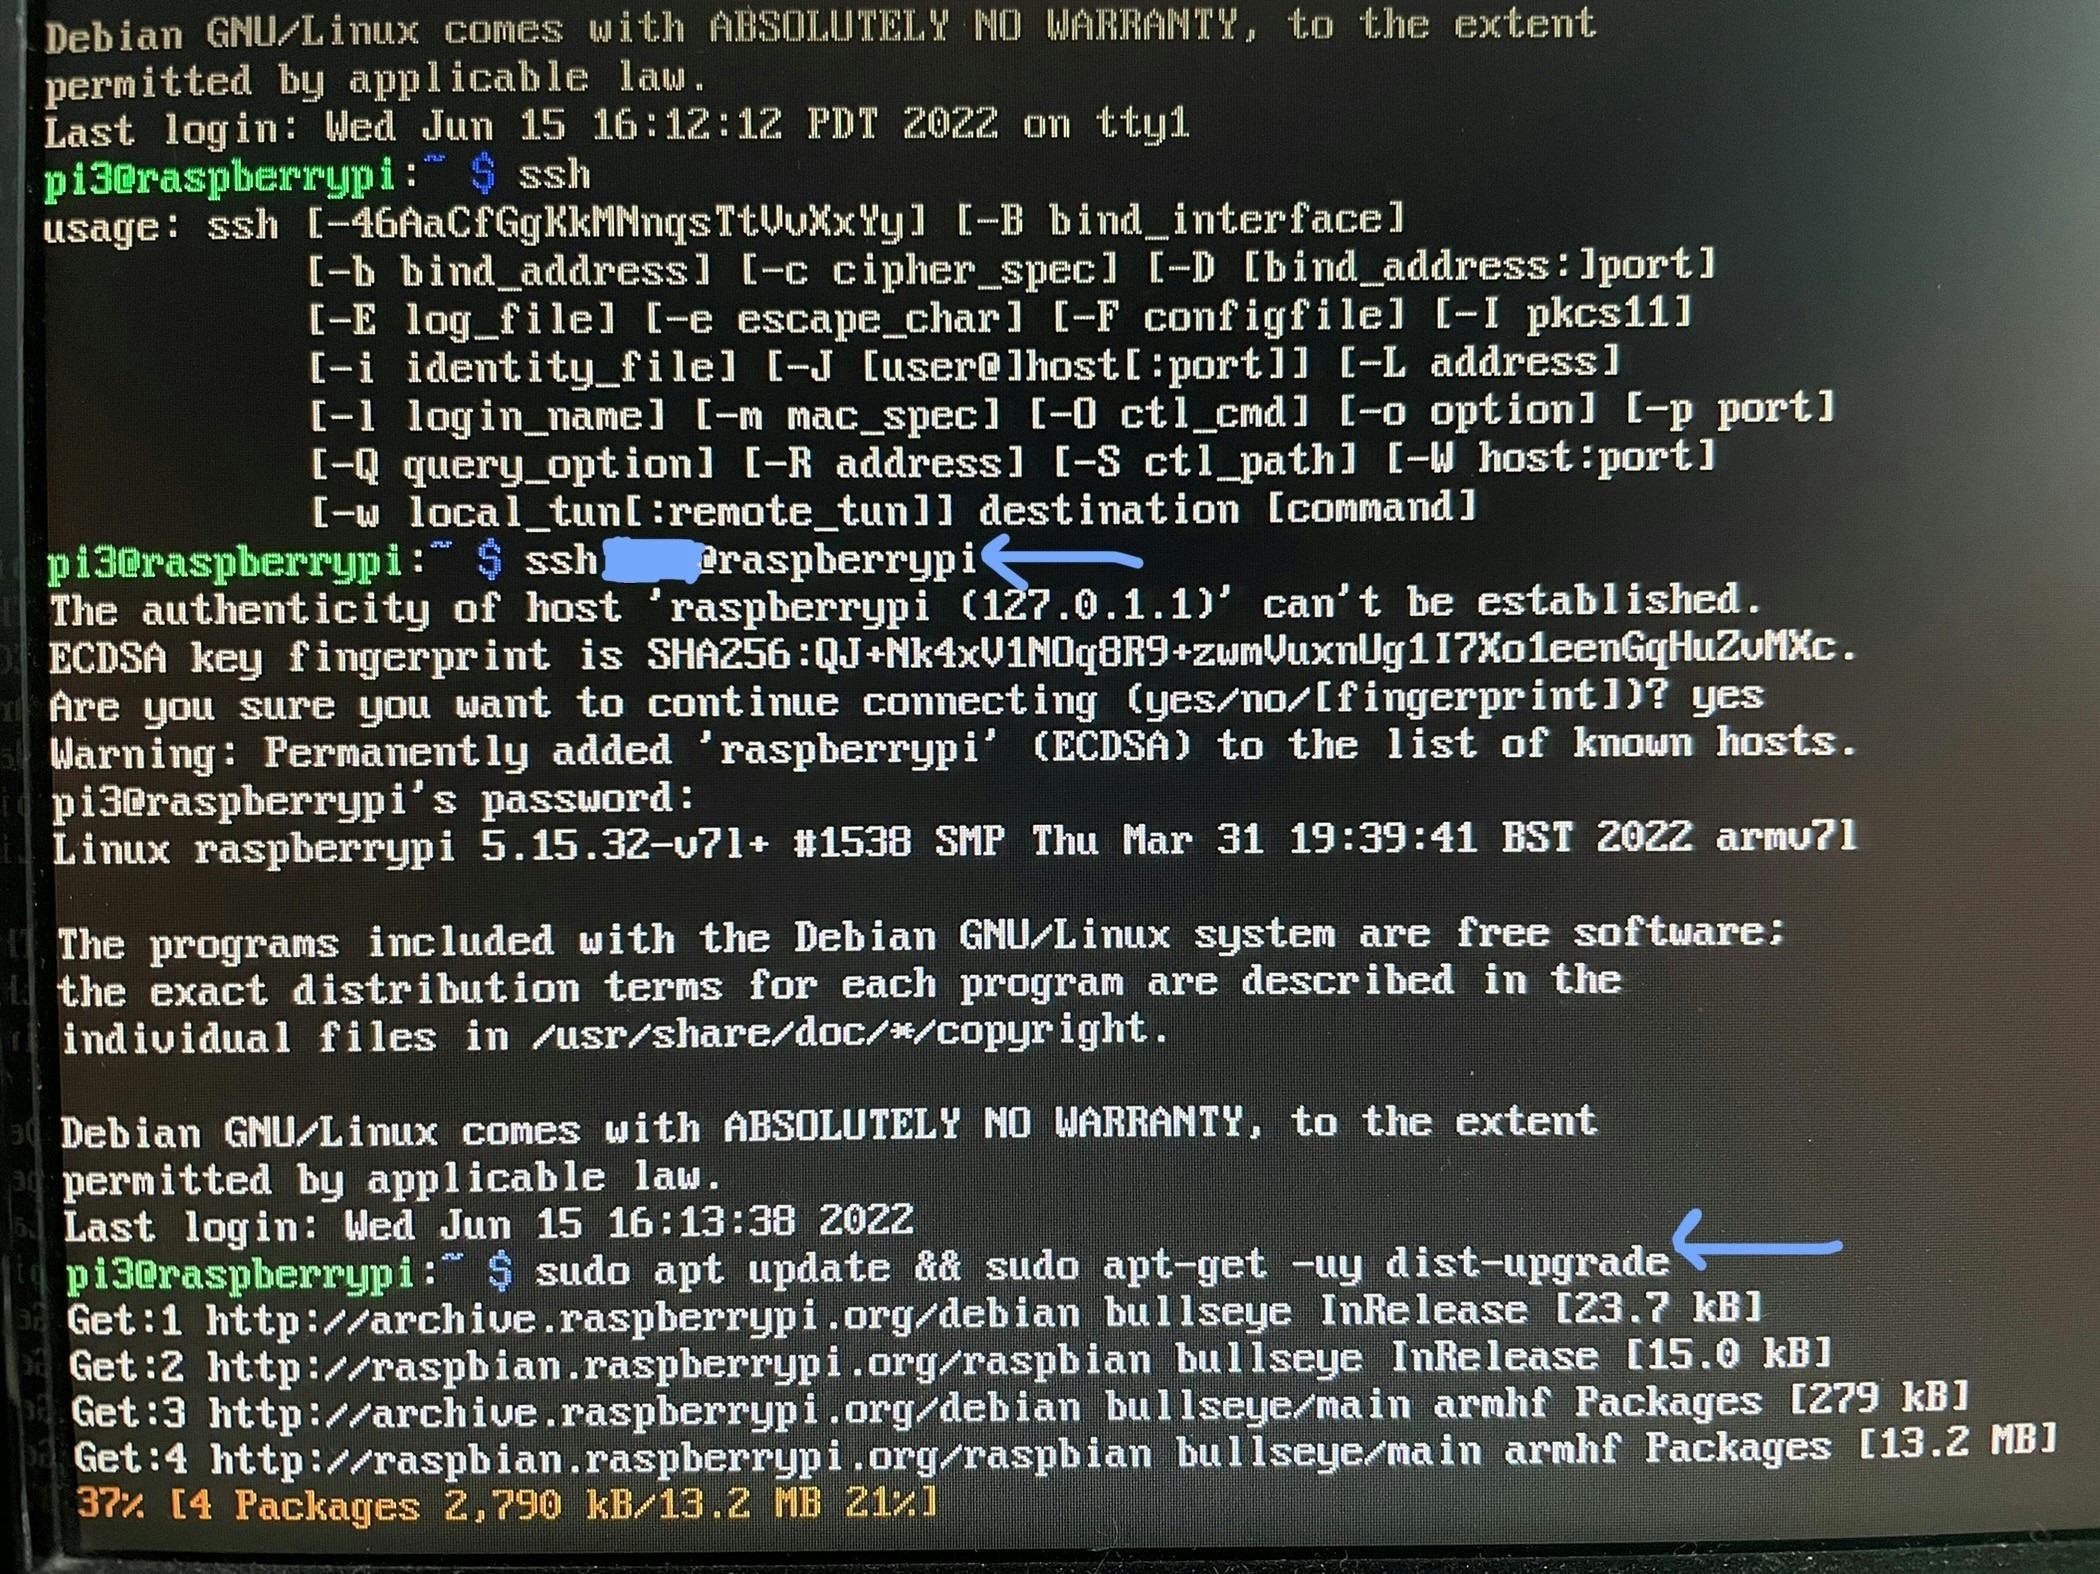
- set up SSH in the terminal by running the following command:
ssh [username]@[hostname or IP address] -- i.e. ssh pi@raspberrypi
- type "yes" to continue
- then type in the password you created at the beginning
Update and upgrade APT
What is APT: Advanced Packaging Tool -- manages the software through installation, removal, and upgrades within the system
What is "sudo": "SuperUser DO" -- enables a user to temporarily have administrative rights
- updating and upgrade the APT ensures all packages in the system are up-to-date
- input the following command:
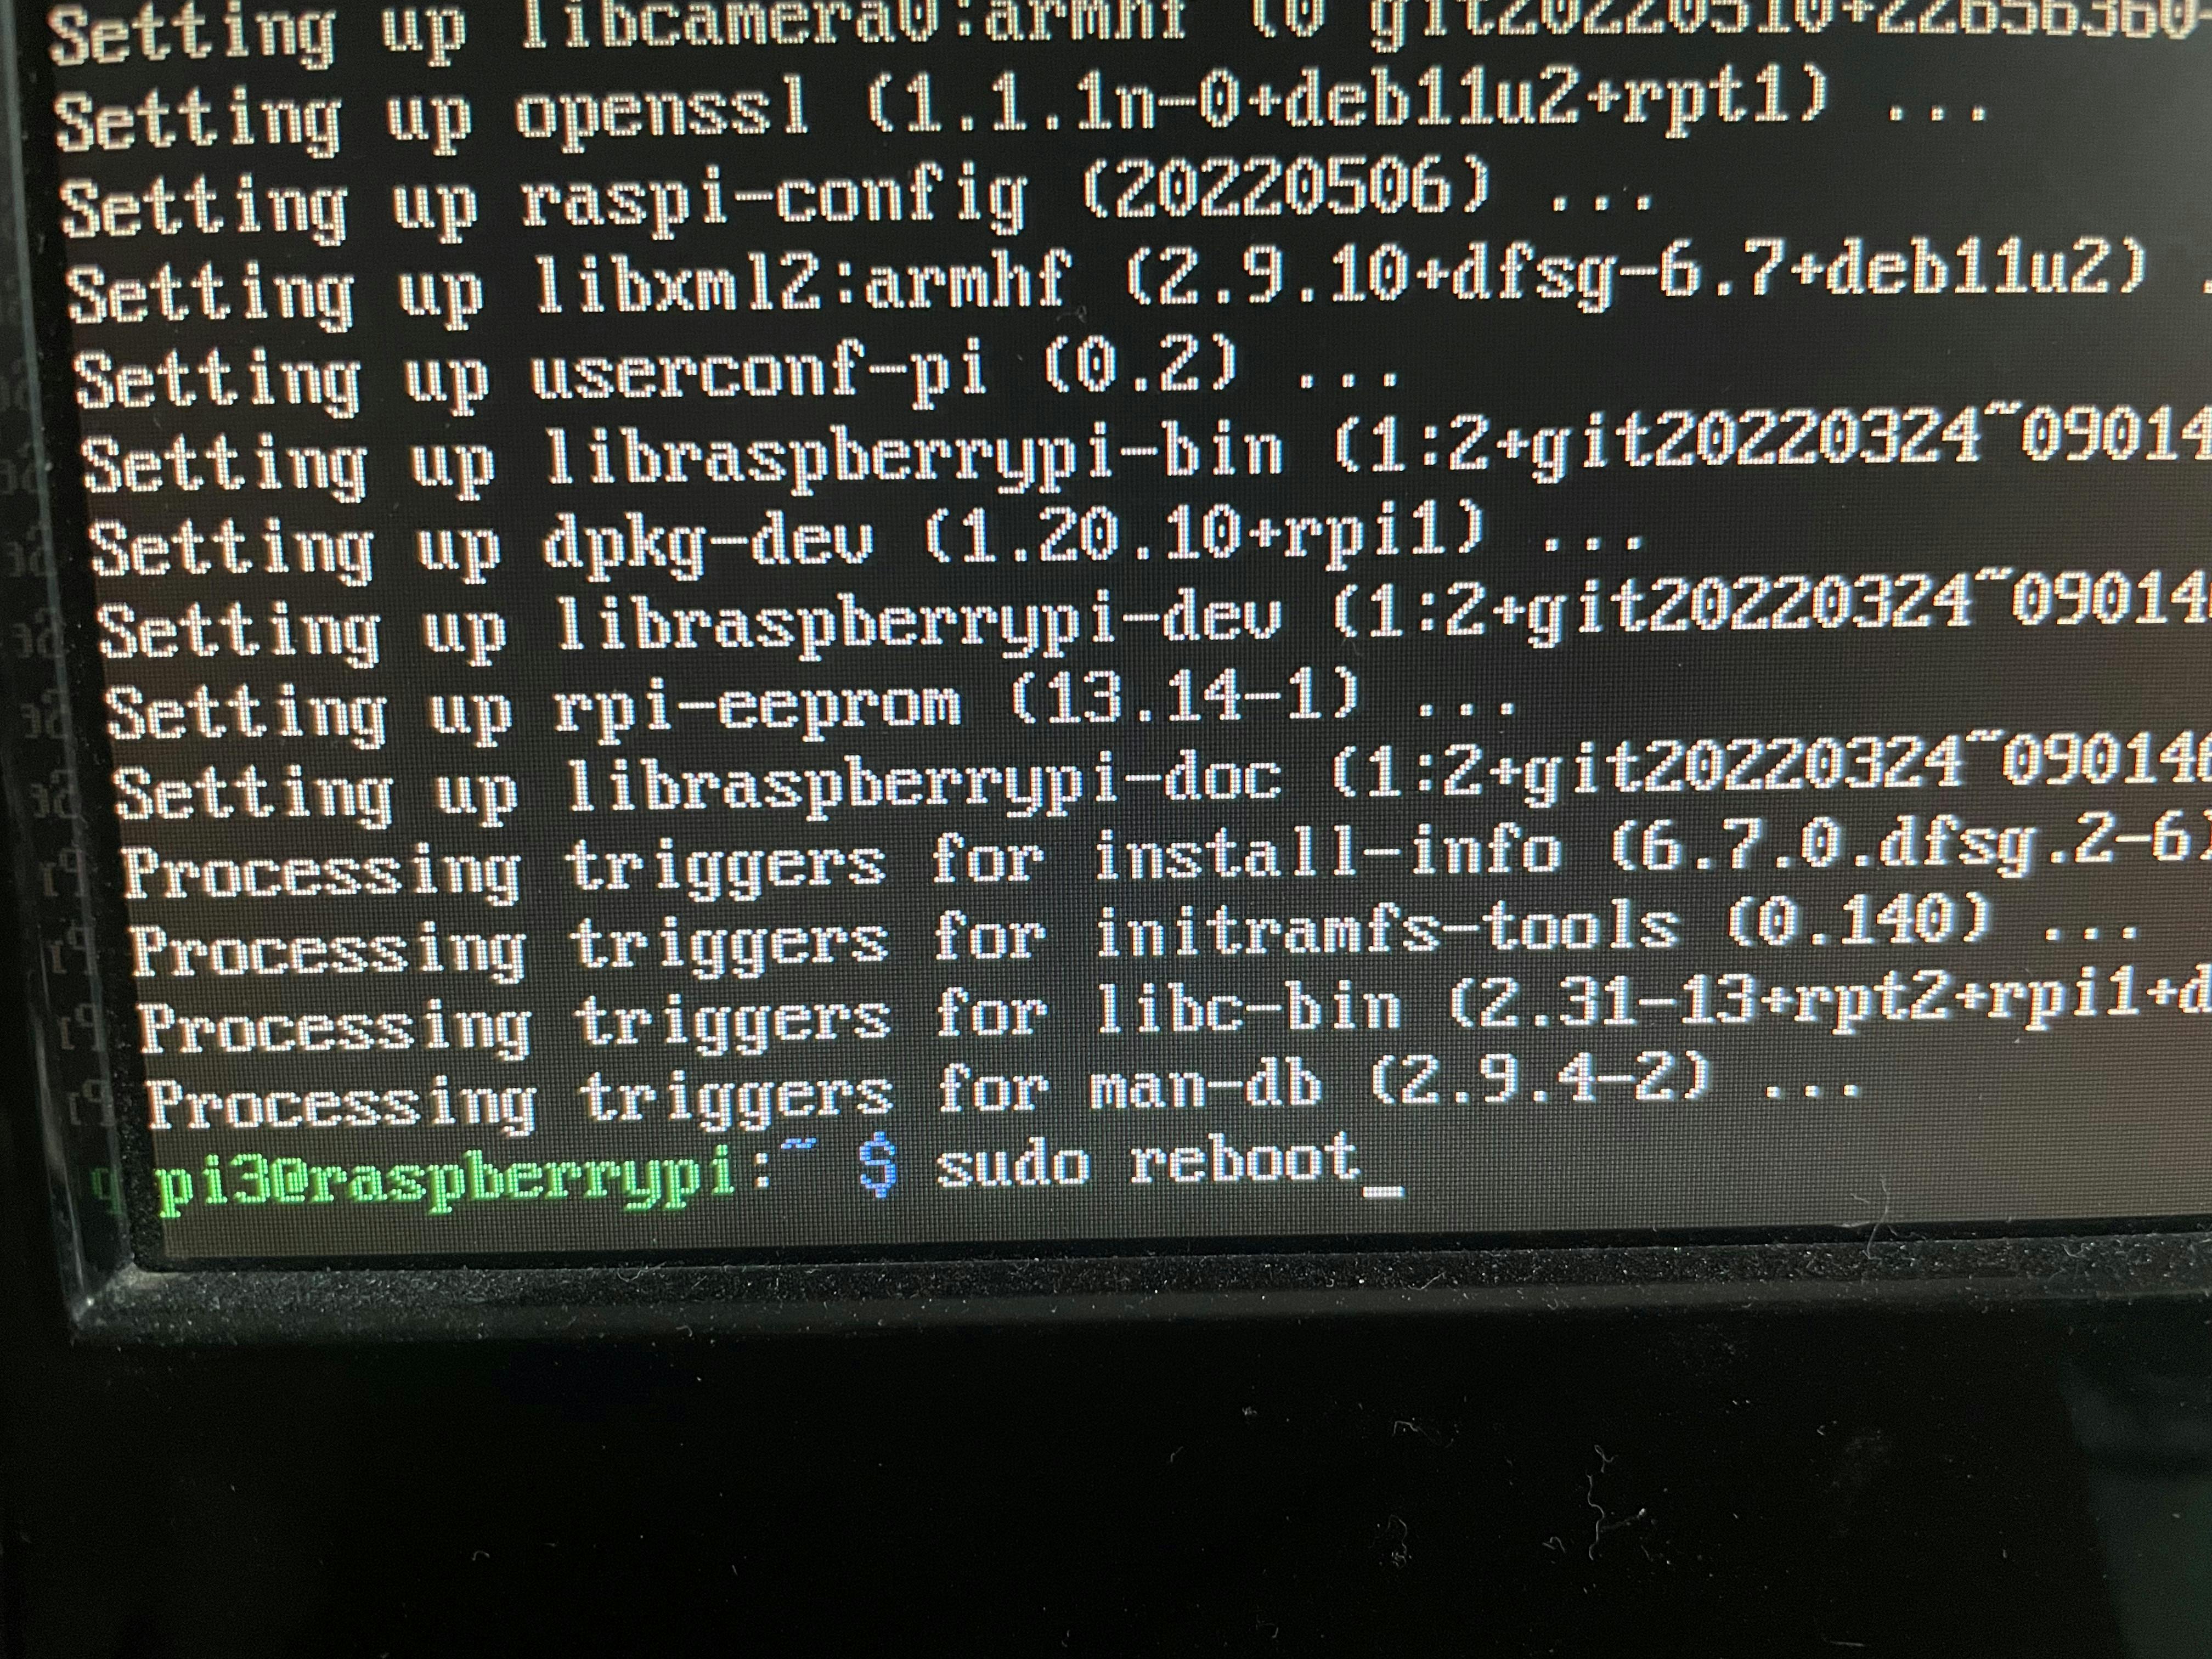
sudo apt update && sudo apt-get -uy dist-upgrade
Reboot
- reboot the RasPi to apply the settings by typing:
sudo reboot

Re-enable SSH
- repeat the same step from earlier to ensure SSH is enabled
At this point, your RasPi is ready for more labs!